

Use these steps to connect an Authorize.Net account to CMS Max with an API Login ID and Transaction Key.
Before starting, review the CMS Max Authorize.Net integration or open an Authorize.Net account.
-
Sign in to Authorize.Net
Open account.authorize.net and sign in with an account that can manage API credentials.
-
Open Account and API Settings
In the New Merchant Interface, select Account from the left navigation, then select Account and API Settings.
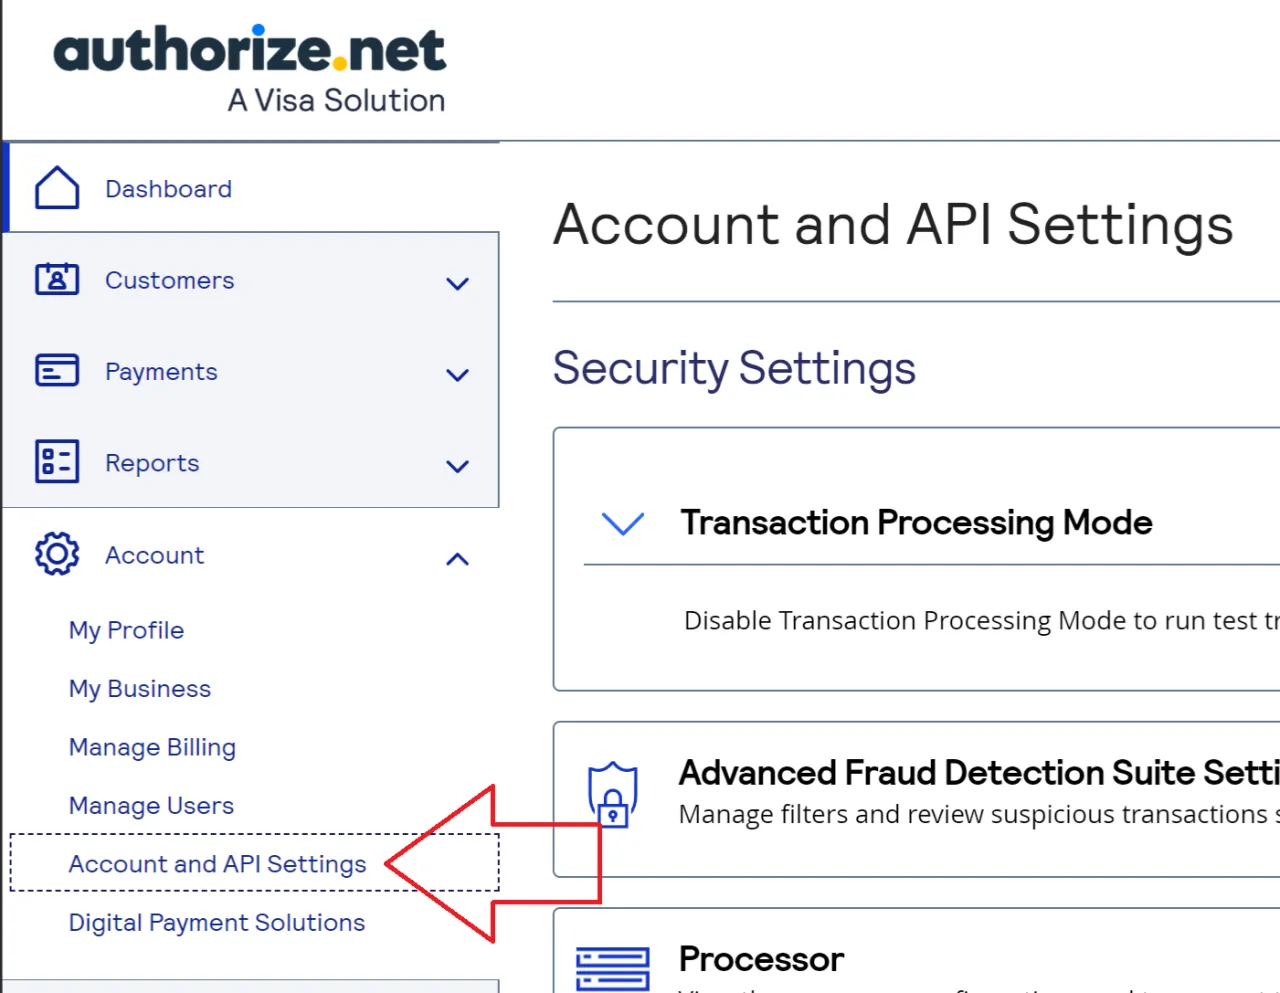
Legacy merchant-interface orientation for API credentials and keys. -
Select API Credentials & Keys
Under Security Settings, select API Credentials & Keys.

CMS Max stores the API Login ID and Transaction Key in the gateway settings. -
Copy the API Login ID
Copy the API Login ID shown by Authorize.Net. This is the merchant API identifier, not the username used to sign in.
-
Create a new Transaction Key
Select New Transaction Key, choose whether the previous key should be disabled immediately, submit the request, and complete the PIN verification. Copy the key when Authorize.Net displays it.
-
Enter both values in CMS Max
In CMS Max, open Settings ? Plugins ? Payment Gateways. Set Sandbox Mode for the correct environment, enable Credit Card Gateway, select Authorize.net, and paste the values into API Login ID and Transaction Key. Save the changes.
-
Run a test payment
Before accepting live payments, verify a successful payment, a decline, order or form records, customer notifications, the Authorize.Net transaction, and the appropriate void or refund workflow. Use production credentials only when Sandbox Mode is off.
Need help with the connection?
Contact CMS Max with the website domain and the step where setup stopped. Do not send the Transaction Key through the contact form.