Forms
How to create, embed, and manage forms on your CMS Max website, including contact forms, payment forms, and file uploads
Overview
Forms let you collect information from your website visitors — contact inquiries, job applications, bill payments, event registrations, and more. CMS Max includes a built-in form builder that handles submissions, notifications, and file uploads without needing any external tools.

Embedding a Form on a Page
Once you have created a form, you can display it on any page in two ways:
On-Page Embedding
The form appears directly within the page content:
- Open the page editor.
- Place your cursor where you want the form to appear.
- Click Insert Widget in the editor toolbar.
- Search for Form and select it.
- Choose On-Page as the display method.
- Select the form you want to embed.
- Click Insert and save the page.
Popup / Modal Embedding
A button appears on the page; clicking it opens the form in a popup window:
- Follow steps 1–5 above, but choose Popup or Modal as the display method.
- Enter the button label (e.g., "Contact Us" or "Apply Now").
- Click Insert and save the page.
The popup approach keeps your page layout clean while still making the form easily accessible.

Pre-Filling Form Fields via URL
You can pre-populate form fields by adding information to the URL — useful for sharing links with specific information already filled in (for example, sending a customer a payment link with an amount pre-filled).
-
Open the form editor and note the Identifier for each field you want to pre-fill.
-
Add the identifier and value as a query parameter in the URL:
yourdomain.com/contact?name=SamThis would pre-fill a field with the identifier
namewith the value "Sam". -
You can pre-fill multiple fields by chaining parameters with
&:yourdomain.com/contact?name=Sam&email=sam@example.com
Address Autocomplete
If your form includes an address field with autocomplete enabled, visitors can start typing an address and select it from the Google Places suggestions. The form automatically populates all address components (street, city, state, ZIP code).
Note: This feature requires a Google Maps API key. Contact your site administrator if you need this enabled.
Phone Fields
Phone fields format US numbers automatically as visitors type — for example (585) 478-2331.
If your form needs to accept phone numbers from outside the US, enable the Allow international phone numbers toggle in the field's settings. The field then shows a searchable country dropdown with flags and dial codes, formats the number correctly for the selected country as the visitor types, and blocks invalid characters. Submitted numbers are stored in international format (for example +44 7400 123456), so you always know which country a number belongs to.
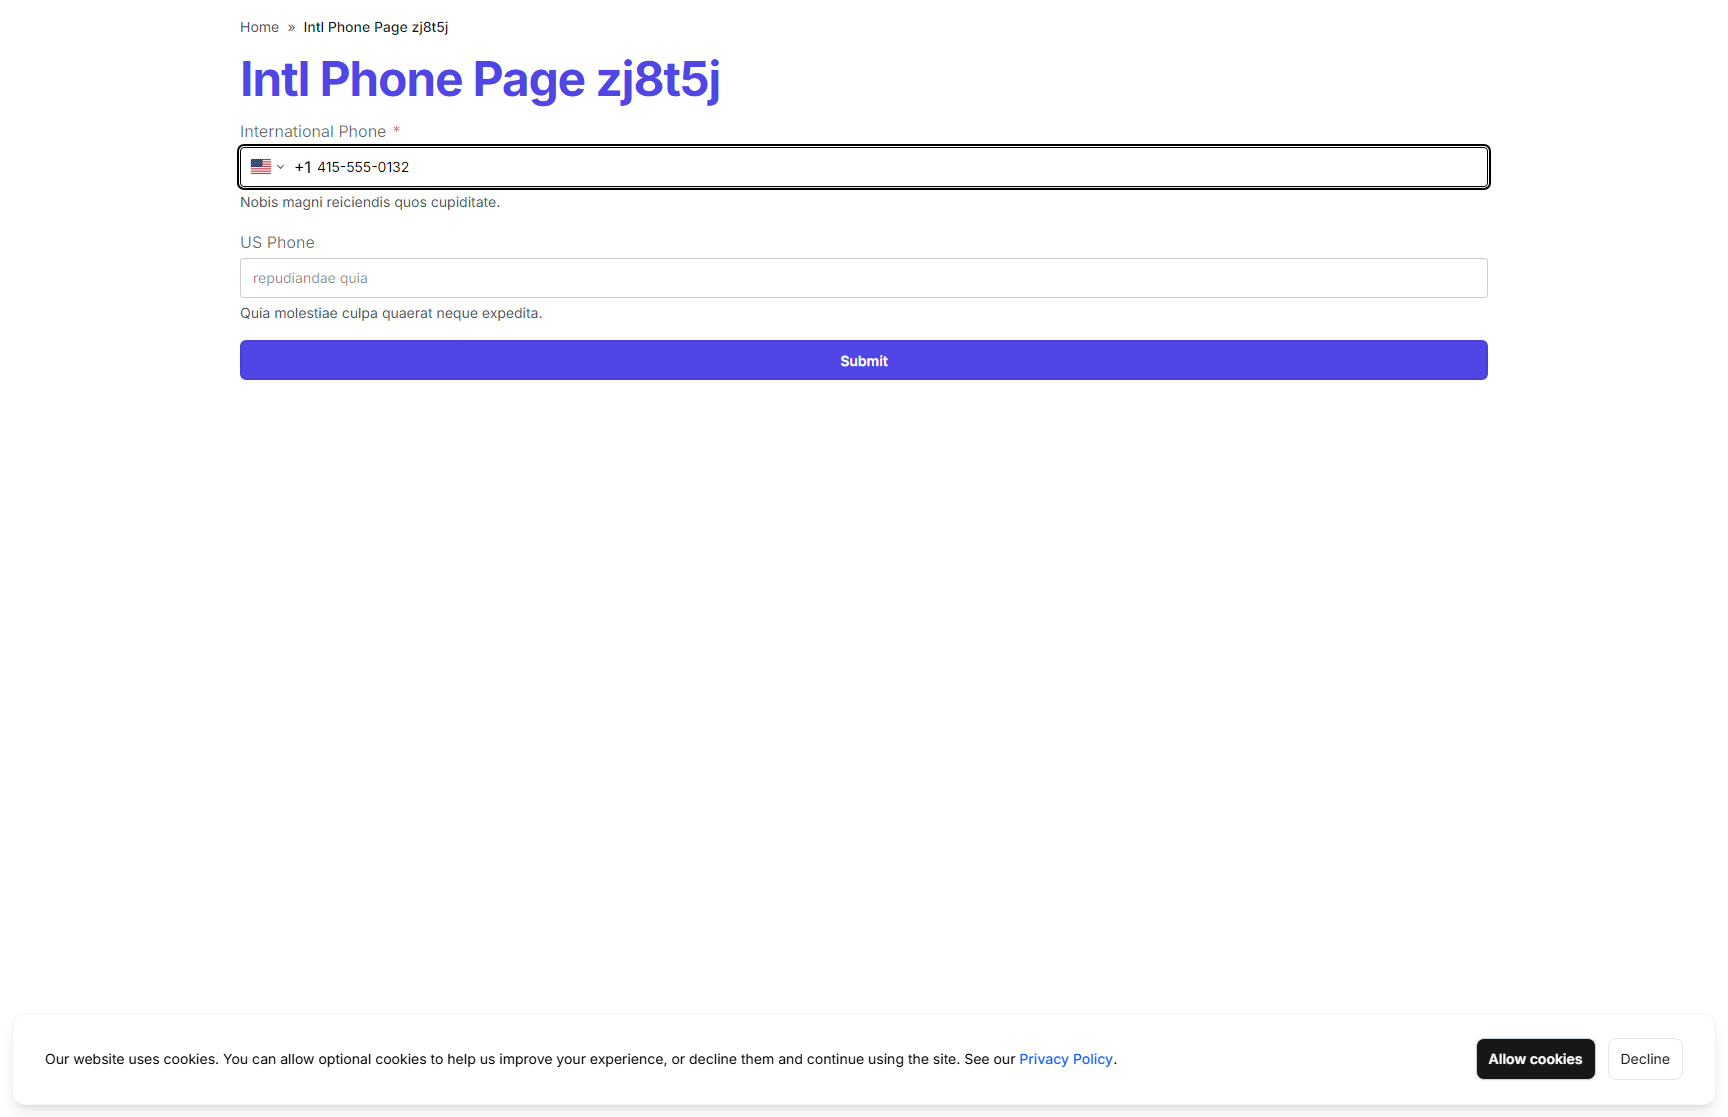
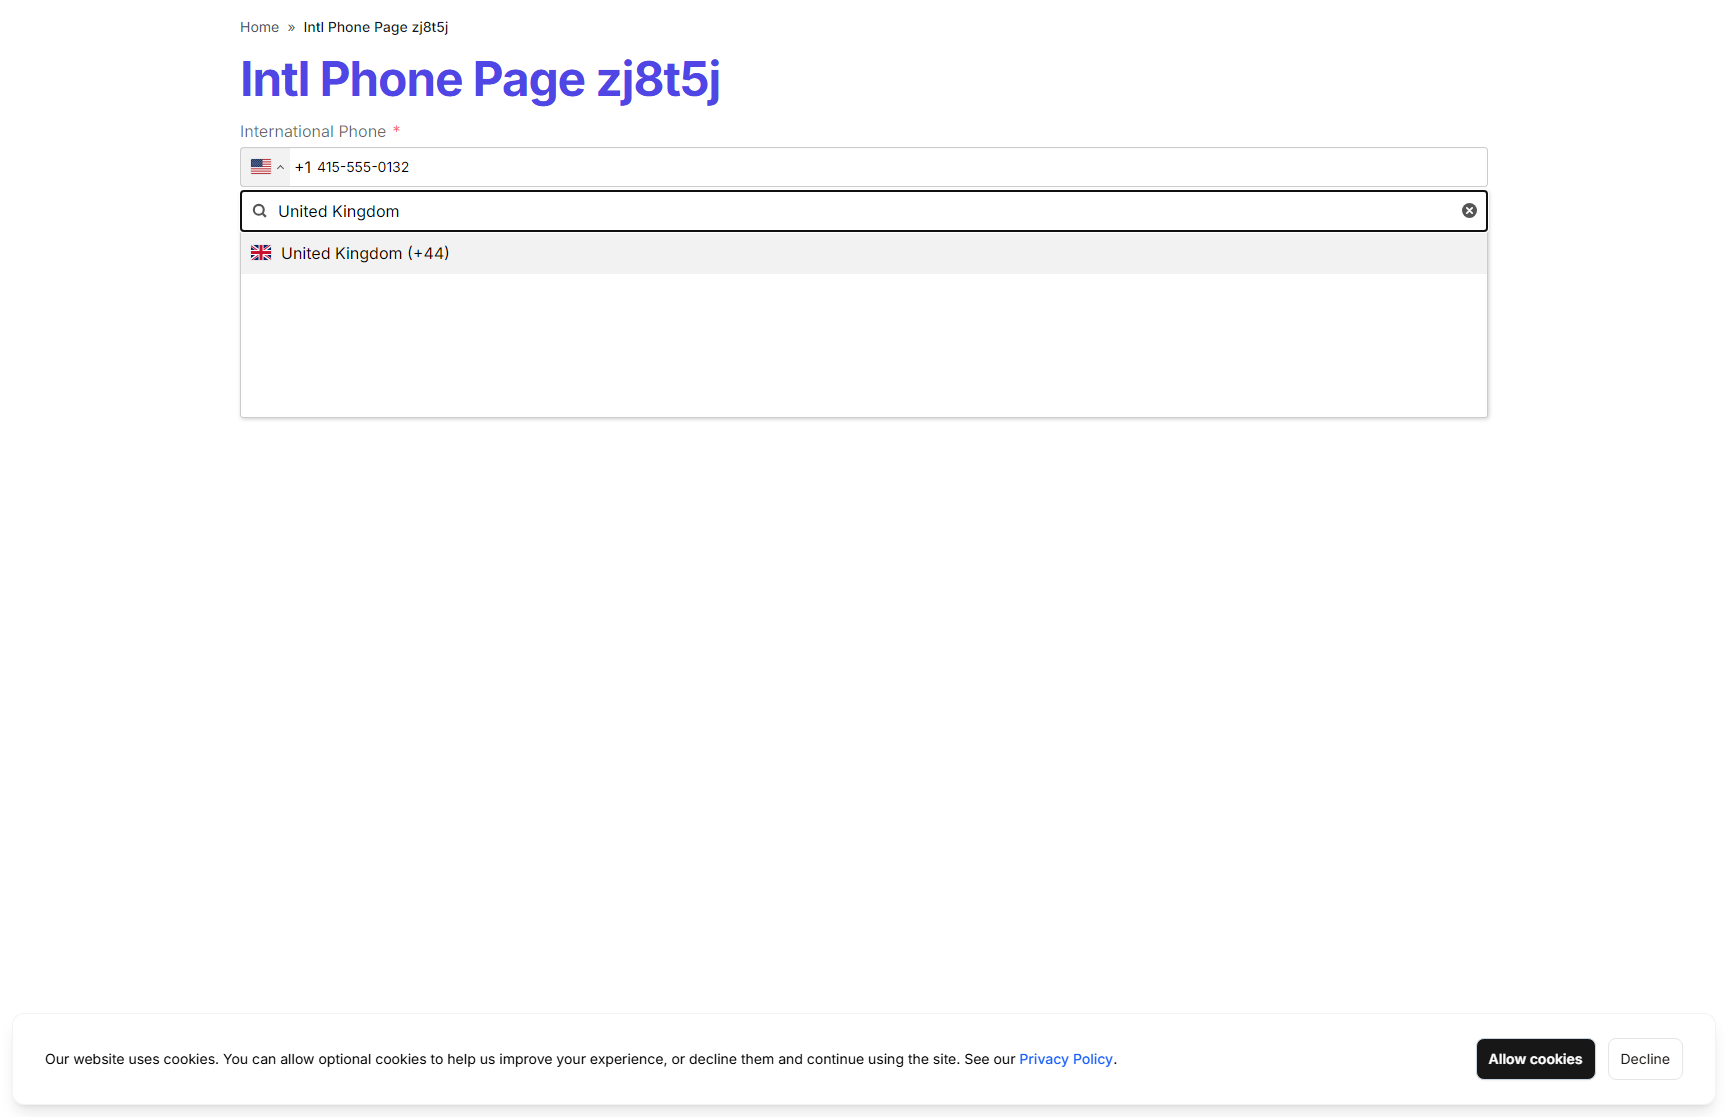
When the toggle is off, required phone fields only accept valid US phone numbers.
Quantity Counter Fields
You can add a Quantity Counter field when you want visitors to increment/decrement numeric values instead of typing free-form text.
- Single mode: one counter shown as
[- number +] - Multiple mode: a list of counters with labels (for example: First, Second, Third)
- Configuration: each counter supports an initial value, minimum, and maximum
- Default behavior: minimum defaults to
0 - Submission format: multiple values are stored as a single text value like
First: 2, Second: 1in exports/webhooks
File Upload Fields
You can add file upload fields to any form, allowing visitors to attach documents, images, and other files to their submission.
Upload Limits
- Maximum file size: 50MB per file
- Multiple files: Forms can be configured to allow multiple uploads, each subject to the 50MB limit
Accepted File Types
| Category | Formats |
|---|---|
| Images | JPG, PNG, GIF, WebP, SVG, AVIF |
| Videos | MP4, MOV, AVI, MKV, WebM |
| Audio | MP3, WAV, OGG, FLAC, AAC |
| Documents | PDF, DOC, DOCX, XLS, XLSX, PPT, PPTX |
| Text | TXT, CSV, RTF |
| Archives | ZIP |
ZIP files follow the same 50MB per-file limit as every other accepted format. Visitors who select a larger file see a message naming the file and the limit, and that file is not uploaded. The Submit button stays disabled until every selected file finishes uploading. Include upload instructions in your form to help visitors prepare their files.
Uploaded files are securely stored in the cloud and accessible from the admin dashboard.
Form Templates
CMS Max provides ready-to-use templates for common form types to help you get started quickly.
Employment / Job Application Form
A standard application form with these fields:
- Name (required)
- Phone (required)
- Email (required)
- Resume upload (optional)
- Additional information (required)
Online Bill Pay Form
Collect payments alongside contact information:
- Full Name (required)
- Phone (required)
- Email (required)
- Notes (optional)
- Invoice Number (optional)
- Payment Amount (required — supports credit card processing)
To use a template, navigate to your form builder and look for an Import option where you can load a template to get started.

Viewing Form Submissions
All form submissions are stored in the admin panel:
- Navigate to Forms in the sidebar.
- Click on the form you want to review.
- Click the Submissions tab or button.
You can search submissions using any submitted field value, such as a person's name or email address. You can also view, export, and manage submissions from there.

Frequently Asked Questions
How do I get email notifications when someone submits a form?
Open the form editor and look for a Notifications or Email Alerts section. Add the email addresses that should receive notifications on each new submission.
Can visitors submit a form more than once?
Yes, by default. If you need to limit submissions per visitor, contact support for options.
Where are uploaded files stored?
Uploaded files are stored securely in CMS Max's cloud storage and are accessible through the form submission details in the admin panel.
How are uploaded filenames handled?
The original filename is preserved (lowercased, with spaces and special characters replaced by hyphens). For example, My Resume.pdf is stored as my-resume.pdf. If a visitor uploads a file with a name that already exists, an incrementing number is appended — my-resume-1.pdf, my-resume-2.pdf, and so on. In rare cases of heavy concurrent uploads, a short random suffix (e.g. my-resume-aB3.pdf) may be used instead. Existing files are never overwritten.
What happens if someone submits a file that is too large?
They will see an error message explaining that the file exceeds the size limit. Include a note in your form instructions advising visitors of the 50MB per file limit.