Connect KORONA POS
Prepare KORONA, connect it to CMS Max, choose pricing and inventory settings, and run the first synchronization.
Before you start
You need a KORONA account with access to Settings > Data Exchange and permission to create or configure an APIv3 connection. Keep these account-specific details ready:
- API endpoint, including the regional KORONA host and
/web/api/v3 - Account ID
- API login
- API password
Do not copy an endpoint from another store. KORONA accounts can use different numbered hosts.
CMS Max reads products, Commodity Groups, Price Groups, organizational units, and product stock. It does not modify those records in KORONA, acknowledge changes, or export orders in this release.
Prepare KORONA
- In KORONA Studio, open Settings > Data Exchange.
- Add or open the APIv3 widget.
- Create a dedicated login for CMS Max instead of sharing a staff login.
- Grant read access to products, Commodity Groups, Price Groups, and organizational units.
- If CMS Max will track stock, also grant access to product stock. The selected organizational units must have warehouses.
- Copy the endpoint, Account ID, login, and password for CMS Max.
KORONA subscription permissions can affect stock access. If the connection succeeds but inventory does not, confirm product-stock access with KORONA support.
Connect CMS Max
- In CMS Max, install and activate KORONA POS from Plugins. Only one POS connector can be installed on a site.
- Open eCommerce > POS Sync > Settings > Credentials.
- Enter the account-specific API Endpoint, Account ID, API Login, and API Password.
- Save the settings. CMS Max validates the connection and securely stores the credentials.
- Confirm the Price Group that supplies website prices. CMS Max preselects the most likely standard retail group, but does not combine prices from multiple groups.
- Choose Combine All Locations, Use One Location, or Do Not Track Stock:
- Combine All Locations adds stock from every warehouse-enabled organizational unit.
- Use One Location imports stock from the selected warehouse location.
- Do Not Track Stock keeps imported products sellable without requesting KORONA stock.
- Save again after confirming the Price Group and inventory choice.
Changing the connector, endpoint, or Account ID later resets the saved KORONA revision history and remote selections. Treat that as connecting a different account and review every setting again. The next product run is automatically a full import so records missing from the replacement account can be reconciled safely.
Review product rules
Open Product Rules before the first import. New KORONA connections use safe defaults: KORONA owns product identity, name, price, inventory, and category assignment, while CMS Max retains descriptions, sale fields, shipping, tax, and existing visibility.
If LiquorMax is active, Name and Missing Categories default to Non Liquor Products. This protects Central beverage names and categories while still allowing ordinary KORONA products to use their Commodity Groups.
Products with a zero price remain drafts. KORONA scheduled prices become the CMS Max regular price; they are not automatically treated as sales. Configure tax behavior in CMS Max because KORONA sectors are not TaxJar product tax codes.
Check the connection
- Open eCommerce > POS Sync > Dashboard.
- Select Check POS Status.
- Wait for the background check, then select View Details.
- Resolve any failed credential, Price Group, location, or product-stock check before importing.
This check is read-only and does not advance KORONA revision tracking.
Run the first synchronization
For a new site, use a review-first workflow:
- From More sync options, select Fetch All Products from KORONA. This downloads the full KORONA catalogue and current inventory without creating or changing CMS Max products.
- Review POS Sync > Categories. Archive any Commodity Group whose products should not appear on the website, and configure Excluded from LiquorMax where applicable.
- Review POS Sync > Products, including Needs Attention, mapped values, prices, and representative inventory quantities.
- Select Apply Fetched Products to Site.
- Wait for all stages to finish and confirm that Pending Updates and Needs Attention are both zero, or review every remaining exception.
- Check several public product pages before enabling automated synchronization.
After the first successful import, Sync Products & Inventory and scheduled runs request only newer product, Commodity Group, and inventory revisions. KORONA returns deleted records as inactive so CMS Max can archive them without downloading the complete catalogue again. CMS Max advances each revision only after the returned pages have been stored and applied safely.
Choose an automation schedule
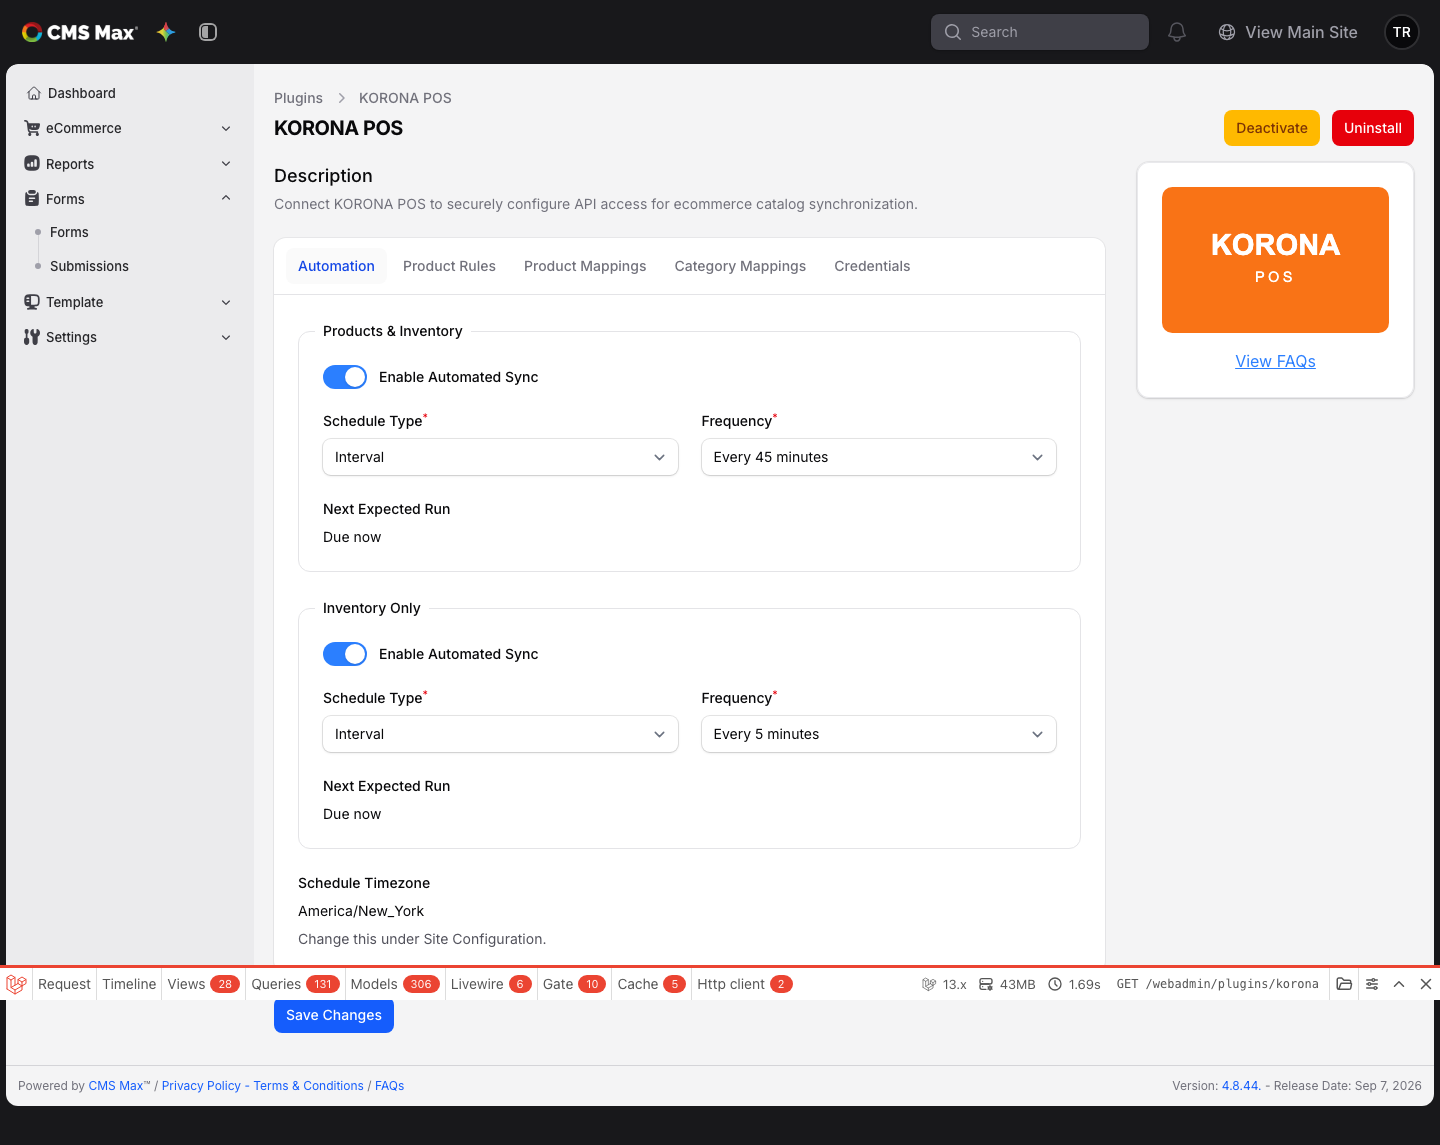
Enable Product Updates (includes inventory) for routine catalogue changes and Additional Inventory Updates when stock needs a different frequency. Both use the dedicated POS synchronization queue. Either schedule can run at an interval or daily, weekly, or monthly.
If KORONA API access is interrupted or revoked, you can still disable both schedules and save the settings. CMS Max verifies the connection again when you replace the credentials or change a KORONA account-specific selection.
KORONA publishes a daily-limit response but does not publish one universal polling allowance for every account. Start conservatively, monitor Recent Runs for rate-limit warnings, and confirm the recommended frequency and daily allowance with KORONA for the customer's subscription.
Recover from a problem
Run Sync Products & Inventory again after correcting a temporary connection or data issue. Successfully linked products are updated rather than duplicated.
Use Re-fetch All Products & Inventory only for recovery, source-deletion reconciliation, or a setting change that requires every KORONA record to be reconsidered. It is a full source read, not the normal incremental synchronization.