Adding Customers
Invite a shopper to join your store and manage their request.
Adding customers
Use eCommerce → Customers → Add customer to invite someone to join your store, including a guest who has ordered before. Administrators and editors can send, edit, resend and cancel requests. Viewers can review the invitation list.
- Enter their email, first name and last name.
- Choose an enabled customer group, or leave Default selected.
- Set Tax exempt if appropriate, then submit.
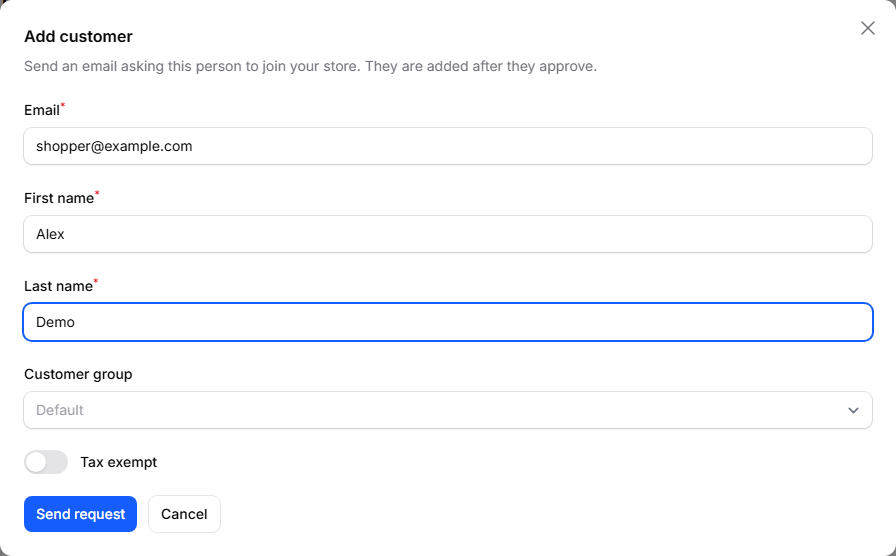
The example above uses demonstration data.
CMS Max sends the shopper an email naming your store. They must open Review request and choose Approve before they are added. The email does not mention their group or discount. If they already belong to your store and have a login, you get an Already a customer message with a link to their customer page.
The shopper may be asked to choose a password to secure their account. After approval, Continue to your store takes them through sign-in. Their group pricing applies when they are signed in. A shopper who signed up and opened checkout before approving still gets the invited group and tax setting; one you already moved to another group keeps that group.
Your Customers list shows each guest checkout as its own row. When a guest who already ordered from your store approves, their latest guest row becomes their account, with its orders, so no new row is added. Rows from their earlier guest checkouts stay listed separately, and so do all their guest rows if they already had an account from another store. On their account's My Orders page, the shopper sees every order placed with that email at any CMS Max store, including guest orders.
The shopper confirms before declining. If they decline by mistake, they can open the same email link again and choose Review the request again until the link expires.
Managing requests
Open Invitations from the Customers header or the eCommerce menu.
| Status | Meaning |
|---|---|
| Pending | Awaiting the shopper's response, or queued for delivery. |
| Expired | The seven-day link has expired. |
| Not delivered | Delivery failed or did not finish. |
| Accepted | The shopper approved and is in your Customers list. |
| Declined | The shopper declined. You cannot invite this email again, but the shopper can reopen the request from their link until it expires. |
| Cancelled | You cancelled the request. Its link no longer works. |
Use Edit to correct a pending request's name, customer group or tax exempt setting. No new email is sent and the sending limits are not used, because the email doesn't mention those details; the shopper gets the corrected details when they approve. To fix a wrong email address, cancel the request and send a new one to the right address.
Use Resend to send a new link for a pending, expired or undelivered request. The new link replaces the old one. Use Cancel if the request is no longer needed. Accepted, declined and cancelled requests cannot be edited or resent.
Allow at least 24 hours between sends to one email. Each email can receive at most three requests from your store in 30 days, and your store can send up to 50 requests in 24 hours. Failed sends count toward these limits. A declined shopper can still register with your store themselves.
If Add customer is unavailable, contact your website administrator to check the checkout connection.
See Customer Groups for editing an existing customer's group.